Posted on

Anleitung für eine Mütze mit Naalbinding (Nadelbinden)

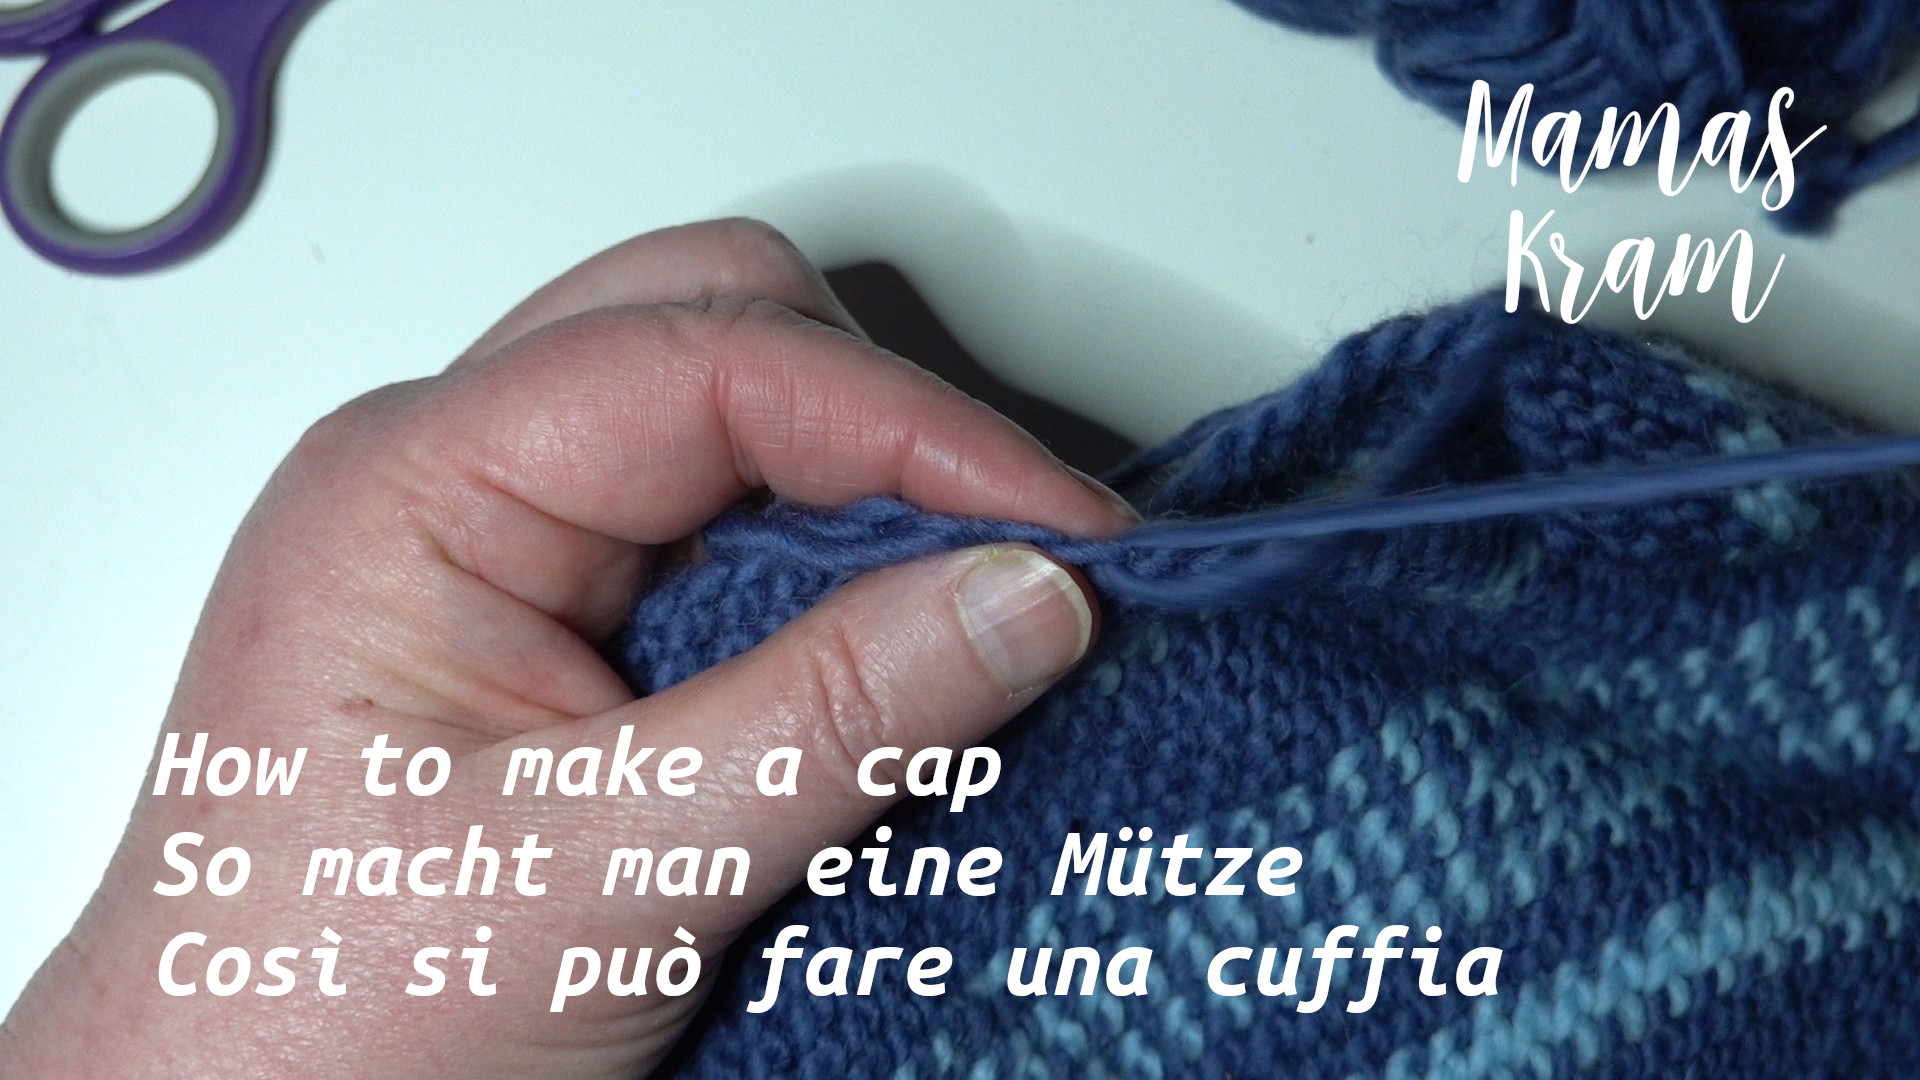
Dieses Video zeigt, wie man eine einfache und dehnbare Mütze mit Naalbinding herstellt. Ich benutze in diesem Video sowohl die traditionelle Holznadel als auch eine aus Metall und auch zwei Arten, um neuen Faden zu “befestigen”.

Wie ihr vielleicht schon gesehen habt: Man bekommt eine Art Linie, wenn man immer an der gleichen Stelle zunimmt. Um das zu vermeiden, fange ich in der 5. oder 6. Runde an, die verdoppelte Schlaufe (Zunahme) immer an verschiedenen Stellen zu platzieren und zähle die Schlaufen/Schlingen dann normal weiter. Nachfolgend wiederhole ich die Zunahmen so, wie ich sie in den Untertiteln geschrieben habe.

Du fragst dich vielleicht, wie oft ich die Anzahl der Schlingen erhöht habe: Am Ende hatte ich 50 Schlingen pro Runde.
Und die Anzahl der Runden: 52 für diese Mütze.
Garn: Ich werde dir einige Links zu Garnen geben, die dem entsprechen, was ich hier verwende. ( Denkt immer daran, auf euren lokalen Märkten zu kaufen :-))
Verwendete Garnmenge: ca. 60 g (50 g = 50 m / für Stricknadeln 8 mm / UK 0 / US 11)

Die Nadel:
ABER: jeder von uns arbeitet anders. Deshalb ist es am einfachsten, die erste Mütze anzufertigen, indem man sie immer wieder abmisst, so wie ich es im Video mache, und mit einer Mütze vergleicht, die passt. Die andere Möglichkeit ist, einfach zu messen, wie sie auf den Kopf passt. Anders als beim Häkeln oder Stricken kann man diese Mützen nicht einfach auftrennen. Der Vorteil des Nadelbindens ist, dass man keine Laufmaschen bekommt (wie man es oft bei gestrickten Kleidungsstücken hat). Da dieser spezielle Naalbinding-Stich (der meines Erachtens der einfachste ist) eine sehr dehnbare Mütze ergibt, muss die Weite nicht so genau sein wie beim Oslo-Stich (der von den meisten Nadelbinderinnen verwendet wird).

Anleitung:
Runde 1: 5 Schlingen binden
Runde 2: jede Schlinge verdoppeln –> 10 Schlingen
Runde 3: jede zweite Schlinge verdoppeln –> 15 Schlingen
Runde 4: jede dritte Schlinge verdoppeln –> 20 Schlingen
Runde 5: jede vierte Schlinge verdoppeln –> 25 Schlingen
Runde 6: Hier ändert sich der Rhythmus, wie man die Schlingen zunimmt. Verdopple die zweite Schlinge und dann jede 5. Schlinge bis zum Ende der Runde –> 30 Schlingen
Runde 7: Verdopple die 5. Schlinge. Dann jede 6. Schlinge verdoppeln –> 35 Schlingen
Runde 8: hier verdopple ich wieder die 2. Schlinge und dann jede 7. Schlinge –> 40 Schlingen
Runde 9: die 1. Schlinge verdoppeln, dann jede 8. Schlinge –> 45 Schlingen
Runde 10: verdopple die 6. Schlinge und dann jede 9. Schlinge –> 50 Schlingen
Von hier an habe ich nicht mehr zugenommen. Abhängig von der Kopfform können einige Zunahmen weiter unten in Ordnung sein (aber es ist wirklich selten, dass dies nötig ist).

Materialien:
Holznadeln: https://amzn.to/3Ea2jdq (hier würde ich wirklich versuchen, sie auf einem Markt handgefertigt zu bekommen – diese sind nicht gut abgerundet, aber es gibt Holznadeln, die es eben sind)
Stumpfe Metallnadeln: https://amzn.to/3srPRTJ
Stumpfe Metallnadeln (einschließlich einiger zum leichteren Weben): https://amzn.to/3QXgnyF
Spitz zulaufende Metallnadeln: https://amzn.to/3YNcKwS
Wolle: https://amzn.to/3YQP5fg (es gibt auch mehrfarbige Stränge)

Hier mein Linktree, von dem aus ihr weitere Inhalte finden könnt:
https://linktr.ee/mamaskram

Und wenn du mich auf einen Kaffee einladen möchtest, kannst du das hier tun:
https://www.buymeacoffee.com/mamaskram

Posted on

How to make a cap with naalbinding

This video shows how to make a simple and stretchy naalbinding cap. I am using the traditional wooden needle as well as one made from metal and also two ways of “attaching” new thread.

Like you might have seen by now: you get a line when you always double in the same space. To avoid this I start in the 5th or 6th round to place the doubled loop always in different places and then do my regular loop count. Below I repeat the increases like I wrote them in the subtitles.

You might wonder how often I increased the number of loops: well in the end I had 70 loops per round.
And the number of rounds: 52 for this cap.
Yarn: I will give you some links to yarn that corresponts to what I am using here. (Always consider buying at your local markets :-))
Yarn quantity used: 60 g (50 g = 50 m / for knitting needles 8 mm / UK 0 / US 11)

The needle:
BUT: each of us works differntly. Therefore the easiest way to make the first cap is measuring it over and over again, just like I do in the video, comparing to a cap that fits. The other way is simply to measure how it fits on the head. Unlike crocheting and knitting you cannot easily unravel these caps. The advantage of naalbinding is that you won’t have any ladders (like you often have it knit garments). Since this particular naalbinding stitch (which is the easiest one IMHO) creates a farily stretchy cap it does not need to be as exact as with the Oslo stitch (which is the one most naalbinders use).

Instructions:
Round 1: bind 5 loops
Round 2: double each loop –> 10 loops
Round 3: double each second loop –> 15 loops
Round 4: double each third loop –> 20 loops
Round 5: double each fourth loop –> 25 loops
Round 6: here the rhythm how to increase loops changes. Double the second loop, and then double each 5th loop until the end of the round –> 30 loops
Round 7: double the 5th loop. Then double each 6th loop –> 35 loops
Round 8: here I double the 2nd loop again, and then each 7th loop –> 40 loops
Round 9: double the 1st loop, and then each 8th loop –> 45 loops
Round 10: double the 6th loop, and then each 9th loop –> 50 loops
From here on I did not increase any more. Depending from the head form, some increases further below might be fine (but it is really rare that this is needed).

Materials:
Wooden needles: https://amzn.to/3Ea2jdq (here I would really try to get them hand made from a market – these are not rounded well, but there are wooden needles)
Blunt metal needles: https://amzn.to/3srPRTJ
Blunt metal needles (including some for easier weaving): https://amzn.to/3QXgnyF
Pointed metal needles: https://amzn.to/3YNcKwS
Wool: https://amzn.to/3YQP5fg (there are also multi-coloured skeins)

Here is my linktree, from where you can find other contents:
https://linktr.ee/mamaskram

And if you would like to buy me a coffee, you can do so here:
https://www.buymeacoffee.com/mamaskram

Posted on

Schlehenlikör

Mein eigenes Rezept:
Nimm eine 0,7 l Flasche und fülle sie bis gut zur Hälfte mit Schlehen. Wenn noch kein Frost war, dann gib sie einige Tage vor der Verwendung in den Gefrierschrank. Gib 3 El Zucker über die Schlehen und fülle die Flasche dann mit 40%-igen Korn oder Vodka auf. Wobei ich persönlich Korn vorziehe. Lasse den Likör wenigstens 2 Monate ziehen. Umso länger er zieht, desto besser wird er.

Image by Manfred Richter from Pixabay

Posted on

Mamas Tagebuch – 11. bis 17. August 2023

Bitte aktiviere die Untertitel auf Deutsch.

Zucchiniernte, Tomaten befestigen, Nadelbinden usw.

Es waren soooo viele Zucchini zu ernten. Sehr wahrscheinlich werde ich sie als Zucchini-Tomaten-Sauce und Chutney einmachen. Ich habe auch gelesen, dass Apfel-Zucchini-Chutney eine tolle Sache sei, na ja, mal sehen :-))) – Auch waren noch ein paar weitere Tomaten reif. Es sind nicht viele in diesem Jahr. Wenn ich Glück habe, habe ich bis November noch ein paar grüne und kann daraus vielleicht ein Chutney machen. Die Blätter, die gelb werden, müssen entfernt werden und das mache ich fast jeden Tag, wenn ich sie sehe. Endlich blühen auch die Stangenbohnen und ich hoffe, dass es nicht ständig regnet, damit sie eine Chance haben, bestäubt zu werden. Dagegen konnte ich von den Buschbohnen bereits einige Bohnen ernten. Die Tomaten- und Chilipflanzen müssen immer wieder befestigt werden. Sie wachsen und neigen zum Umkippen.
Ich stricke auch die anderen Größen der Babysocken für meine Freundin. Die neue Wintermütze meines Mannes ist auch in einer sehr alten Naalbindetechnik entstanden. Das komplette Video zum Nadelbinden folgt noch.

Hier mein Linktree, von dem aus du weitere Inhalte finden kannst https://linktr.ee/mamaskram

Und wenn du mich auf einen Kaffee einladen möchtest, kannst du das hier tun: https://www.buymeacoffee.com/mamaskram

Musik:
Kind Celtic Loop by Alexander Nakarada | https://www.serpentsoundstudios.com Music promoted by https://www.free-stock-music.com Creative Commons / Attribution 4.0 International (CC BY 4.0) https://creativecommons.org/licenses/…
Freedom by Alex-Productions | https://onsound.eu/ Music promoted by https://www.free-stock-music.com Creative Commons Attribution 3.0 Unported License

Posted on

Il diario di mamma – 11 – 17 agosto 2023

Per piacere attiva i sottotitoli in italiano.

Raccolta delle zucchine, naalbinding, curare i pomodori ecc.

C’erano così tante zucchine da raccogliere. Molto probabilmente le conserverò come salsa di zucchine e pomodori e come chutney. Ho anche letto che il chutney di mele e zucchine è una cosa fantastica, beh, vediamo :-))) – Sono maturati anche altri pomodori. Non ce ne sono molti quest’anno. Se sono fortunata, ne avrò un bel po’ di verdi entro novembre e forse potrò farne un chutney. Le foglie che ingialliscono devono essere rimosse e lo faccio quasi ogni giorno, quando le vedo. Infine, anche i fagioli stanno producendo alcuni fiori e spero che non piova continuamente, in modo che abbiano la possibilità di essere impollinati. I fagioli a cespuglio, invece, hanno già prodotto dei fagiolini che ho potuto raccogliere. Le piante di pomodoro e di peperoncino devono essere attaccate più e più volte: stanno crescendo e tendono a piegarsi. Sto lavorando a maglia anche le altre taglie dei calzini per bambini per la mia amica. Anche il nuovo cappuccio invernale di mio marito è finito con un’antica tecnica di rilegatura del filo. Seguirà il video completo su come realizzarlo.

Ecco il mio linktree, da cui puoi trovare altri contenuti: https://linktr.ee/mamaskram

E se vuoi offrirmi un caffè, puoi farlo qui: https://www.buymeacoffee.com/mamaskram

Musica:
Kind Celtic Loop by Alexander Nakarada | https://www.serpentsoundstudios.com Music promoted by https://www.free-stock-music.com Creative Commons / Attribution 4.0 International (CC BY 4.0) https://creativecommons.org/licenses/…
Freedom by Alex-Productions | https://onsound.eu/ Music promoted by https://www.free-stock-music.com Creative Commons Attribution 3.0 Unported License

Posted on

Mom’s Diary – Aug. 11 to 17, 2023

Please set the subtitles to English

Zucchini harvest, naalbinding and attaching tomatoes etc.

There were soooo many zucchini to be harvested. Very likely I will preserve them as a zucchini-tomato sauce and some chutney. I also read that apple-zucchini-chutney was a great thing, well, let’s see :-))) – Also some more tomatoes were ripe. There are not many this year. If I am lucky, I will have quite some green ones by November and maybe can make a chutney from these. The leaves getting yellow need to be removed, and I do this nearly every day, when I see them. Finally, also the pole beans are having some flowers and I hope that it is not going to rain continuously so that they have a chance to be pollinated. The bush beans on the other hand already produced som green beans which I could harvest. The tomato and chili plants need to be attached over and over again. They are growing and tend to fall over. I am also knitting the other sizes of the baby socks for my friend. My husband’s new winter cap also got done in a very old naalbinding technique. The complete video on how to make it will follow.

Here is my linktree, from where you can find other contents: https://linktr.ee/mamaskram

If you would like to buy me a coffee, you can do so here: https://www.buymeacoffee.com/mamaskram

Music:
Kind Celtic Loop by Alexander Nakarada | https://www.serpentsoundstudios.com Music promoted by https://www.free-stock-music.com Creative Commons / Attribution 4.0 International (CC BY 4.0) https://creativecommons.org/licenses/…
Freedom by Alex-Productions | https://onsound.eu/ Music promoted by https://www.free-stock-music.com Creative Commons Attribution 3.0 Unported License

Posted on

Growing peach trees from pits

Peach tree cultivation from pits has many advantages, but also several downsides. It gives varieties that bear very little, almost nothing, and are quite different from the mother varieties, such as Mattheser (the so-called wild nectarines), yellow and other varieties that are only useful as rootstocks for grafting, otherwise have no value and must be removed after 10-15 years, having waited in vain for fruit until then.

But good varieties are also obtained from seeds, because all our good varieties are grown from seeds (even the early from Northern America) And there are varieties that have all withstood severe winters. These good varieties are then further propagated by grafting, not from pits. Peaches grown from pits are usually tougher than grafted ones and do not suffer as much from resin flow and cold.

  1. Peach seeds for growing good, portable trees must be selected only from the best, most grateful varieties.
  2. Peach stones need to stay in the ground for the winter. They are placed in the ground before the onset of frost at the time of leaf fall (in autumn). But before that they need to be spread out one by one to dry the flesh adhering to them, so that the seeds inside remain good and do not rot or fester. We put the kernels here in a basket, not in a box or a wooden bucket, even if there are holes in it. The moisture never drains out purely and thus rot the stones. In the basket, first a layer of soil, then a layer of stones (one by one), then soil again and stones again, until the basket is full or the stones are used up. This basket is buried 1/3 to 1/2 m deep in the earth, but not where groundwater comes; they remain in the earth until the spring sowing time of vegetables and other seeds.
  3. Each individual peach stone (peach seed) is taken by hand in the spring and knocked open. For this purpose, it is held on a stone or other hard object, the seam up and down, not the tip, not even the broad side, because then when tapping many seeds go in two with the shells. Even when tapping lightly, the two shells go off the kernel very easily and smoothly. The kernels are now placed on a prepared bed, with the tip down, because that is where the root is formed.By tapping them, the germination capacity of the kernels is increased to 90%. If the stones are placed on the land right in the fall, the germination capacity is only 40-50%, because many germs are not able to break apart the shells. Besides, in winter the vermin drags away a lot of stones, which does not occur when the stones are laid together.
  4. The seeds now go 3 – 5 cm deep under the ground.
  5. Of course, if you put the peach seeds together on a bed of better garden land, it is better. The young seedlings will be faster to find later, can also be more cared for, spared and cleaned.
  6. When the tree is one year old, it is transplanted and pruned back to 5-6 eyes, so that in the second year the crown is formed, and then the tree can be given the form, as a trellis or for the open air. It is still necessary to prune the branches every year, because the peach tree has the ambition to grow upwards and will become bare at the bottom if we do not prune it. Finally, it should be noted that in older, non-grafted trees, the fruits grow larger and also juicier with each passing year.

Source: Der praktische Ratgeber im Obst- und Gartenbau (The practical guide to fruit growing and horticulture), published on October 6, 1889, written by A. Werder. Published in German on the website Uropas Bauerngarten (Great Grandpa’s Cottage Garden)

Posted on

137 – Schlehen

Am besten eignen sich die Schlehen zum Einmachen, wenn sie schon einige Nachtfröste bekommen haben. Dieselben werden gut verlesen und mit Wasser aufs Feuere gesetzt. Hier lässt man sie durch und durch heiß werden und thut sie auf ein Sieb. Alsdann kocht man auf 1 kg Schlehen 1/3 kg Zucker in 1/3 l gutem Bieressig auf, schäumt fleißig ab und thut die Schlehen nebst einigen Zimmetstücken und etwas Gewürznelken hinein und lässt sie langsam bis zum Kochen kommen. Alsdann hebt man sie wieder heraus, thut sie in Einmachgläser, kocht den Saft dicklich ein und gießt ihn erkaltet über die Früchte. Nach einer Woche gießt man den Saft nochmals ab, kocht ihn ein und gießt ihn wieder kalt über die Schlehen.

(David Brocke Herzogl. Koch in Ballenstedt – Das Einmachen und Konservieren der Früchte und Gemüse)

Image by Pavlo from Pixabay

Posted on

37 – Apfelsaft

Der Apfelsaft wird gewonnen, wie bei Apfelgelee angegeben ist. Doch nimmt man zum Saftkochen ganz reife, aber auch nicht überreife Äpfel. Man lässt den Saft von den gekochten Früchten, ohne zu pressen, ablaufen, gibt auf je 1 l Saft 250 g Zucker, kocht ihn unter fleißigem Abschäumen so lange, bis er klar geworden ist, füllt ihn nach dem Erkalten in Flaschen, schließt diese und kocht ihn 10 Minuten im Wasserbad.

Image by Jill Wellington from Pixabay